Sunday, June 30, 2013

conference weekend sewing, day 2

day 2 of our general conference weekend sewing, i did some community service sewing whilst listening to the prophets. it seemed fitting. i have a pile of "mama, please fix this" jobs that i normally delegate to my mother, the original sewer-upper. i decided to take on some myself instead. 
 first up, there were some gaping wounds to be healed. i don't have a fancy method for this, i just pick a generally matching thread, double up, knot it, and start whip stitching. at least that's what i think it's called. it feels like i'm whipping through it.
 i just go round and round through the two sides til it looks like there is a satin stitch over the whole area because i keep the stitch that close. this is most definitely not how my uncle ray, the vet i worked for in college, dealt with his patients, but these stitches are meant to be permanent rather than removed. btw, i can remove real stitches, too, if you have a need. i did pick up one or two skills working in a veterinary office for 4 years even if i dislike working in the medical field and really am not much on pets.

 after yogee the bear came little ducky, who had her back wide open. this is an especially vital fix since little ducky was given to daughter#4 by my mother to show her how tiny she was at birth. little ducky is the same size d#4, my littlest at 4 lb, 14 oz, appeared at birth.


d#4 @ 4 wks with little ducky on easter
 

see, if you don't count d#4's tadpole legs, they are the same size. oh, she was sweet! mommies don't have favorites, but some they enjoy more than others at certain stages. my angel.

back to the present. there may have been more patients in need of assistance, but i quit photographing after two. enough documented.

 my oldest daughter did a free-styled embroidery of a temple while she listened. it's not any one temple in particular, but it has the layered look that some of them do and an angel moroni on the top, so it counts. it also reminds me of a wedding cake. i love all their efforts, especially those purely out of their own imaginations.
bountiful, ut temple
in between sessions i managed to baste up "romance in the garden." and make my nephew cry. while i was basting in the main hallway (all that tile makes for the perfect spot), he ran from the back door to the front. right across my quilt! i called out in surprise, stopped him, and kindly (i thought) explained that he'd just stepped on something i was making. he continued on his way to grandma's house next door. (my in-laws are our neighbors. how's that? it works mostly great, thanks for asking.) about 30 minutes later grandpa and said cousin returned with cousin in tears. oops. i really thought i'd been gentle in my straightforwardness, but he's a sensitive 8 year old soul and i'd stomped his feelings more than he'd stomped my quilt. we made up and all was well.

after we were all spiritually full and the sewing was done, we played with cousins in the glorious spring weather gracing our backyard. the girls spent hours carefully collecting the blossoms that fall from the mesquite tree. they thought the blossoms were seeds and could be used to plant more magnificent trees. i didn't disillusion them since they were so pleasantly occupied.

only 6 more months until the next general conference session when we'll get to have another weekend of spirituality and sewing at home. hopefully, some cousins to play with, too.
happy Sabbath, all!

Friday, June 28, 2013

3 panel baby quilt


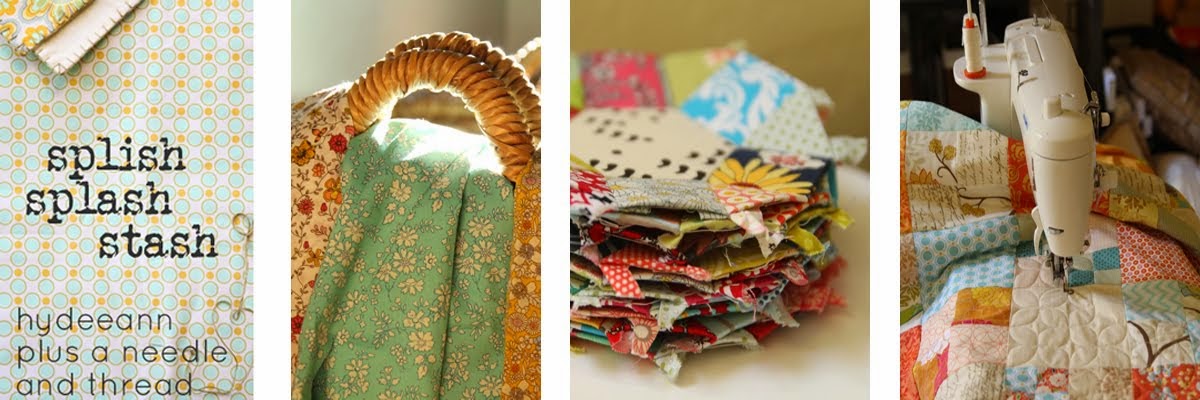
i made up the name for this blog as i was drifting off to sleep one night. it's served it's purpose adequately and because it's a bit different, i think maybe it's memorable or at least intriguing. but sometimes i think i really ought to rename it. now that i've designed my 3rd super-simple quilt that involves numbers in the pattern name, i think maybe i should call this blog "quilting by numbers," like the old paint-by-numbers kits, you know?

this one i call the "3 panel quilt" because that's all it is - 3 panels of fabric on the top. it's about as easy as they come. it's such a no-brainer that i'm pretty confident it's not even original. the concept for this quilt emerged when i needed another small quilt to practice stippling on and i found out our new neighbors 2 doors down are having a baby girl any day now. after hunting my stash for something quick to whip up like the not-quilt, i found 2 fabrics i liked, but one of them was only a 1/2 yd piece. so i grabbed 2 almost identical pieces that coordinated with the 1/2yd and decided to run a 1/4yd of each of them down the sides of the feature panel. that gave me a yard on the front to match the yard of backing i had.

here's the cast. the 3 on the left are the picks for the top. once again i went for a mix of vintage and modern with the graphic animal print (2d zoo by robert kaufman) and the ditsy red florals (alexander henry collection 2008). the back is the mod geo design (hey, hexies in there!) called "groove" by ethan grey for robert kaufman. the green and pink floral (from "just wing it" by momo for moda) is for the binding.  those red alexander henry's have such a nice, smooth hand, by the way - lovely!

i've just met these neighbors, so i don't know anything about their tastes or style. but this baby girl has 3 older brothers already, so i thought maybe this was feminine but not overly-girly. hoping it appeals to them.

as i worked on pressing and cutting, i got entertainment from one of my own girlies, d4. she was begging the skinny strings off me as i squared up the fabric. instead of making jewelry this time, she tied them together for a jump rope.


 this jump roping turned into a circus that i got to have an act in. she said in her best ringmaster voice, "la-dies and gen-tle-men! i present mama, the great quilter!" over and over when i was in the spotlight. other acts included stuffed bears that stayed in the air for over a minute and a sibling or two. it was great quilt-side entertainment.

 i had my sandwich layers spread out all over the central hall floor by the time i was done with day 1's work on the quilt.
 in the morning, i got back to work putting it together. baby made me so very proud when she came into the quilting area and carefully skirted her way around the fabric pieces rather than running all over them like she normally does. this is a first! looks like there is hope for her yet. it was so cute the way she clung to the basket and carefully inched her feet along in the few spare inches next to the quilt. looks like all my nagging training is paying off.

 i roped oldest son, s1, into helping me pin baste. he's one of the kids that actually gets what i'm doing with my quilting and talks to me intelligently about it, using correct terminology when commenting on my work. so it was fun to have him sit with me for a few minutes as we basted.

 he also had projects of his own going on, making some new war engines or something out of the latest book i got him. now don't worry too much, these aren't really "weapons" although there is definitely a "you'll put your eye out" factor if he wasn't careful where he shot the things, like close range at his brother's face or something. but he'd never do that. these are just toys made out of household items that involve a lot of great thinking as he constructs the implements (hidden homeschool physics lessons?) and are purely fun to shoot or launch. they are not being made to use on people or animals so i don't feel like i'm encouraging violence. it's my nod to "i may be a girl, but i get that boys like this kind of stuff." he's always saying to me, "you just don't get it, mom, because you're not a boy." well, i understand this much and sanction it. at least i know what he's creating and can channel it.

back to the quilt.

when i sat down to quilt it, i gamely changed to my free motion foot, dropped the feed dogs, turned down the stitch length to zero, raised my thread antenna, and got sewing.

i thought quite smugly to myself, "see, you are learning lessons from all those mistakes you made. now you won't forget about all the little things you're supposed to do. you're getting to be so good at this!"

i sewed along happily for several minutes when i noticed a funny loop pop up on the top side. "well, that's weird! how did that happen? usually that only happens if something is wrong on the backside . . . oh, sugar! i forgot to check the back after i started to make sure the tension was fine back there." i guess i hadn't remembered everything i was supposed to do after all.
 there was a nasty mess all over the back. so the time i could have spent finishing the quilt was devoted to unpicking. urgh!

everyone else was happily creating, though.

 d3 brought me this little gal she made out of a marshmallow and jolly rancher. if you can't tell, it's a person with hair, face, arms, and legs. sweet!

 and s1 finished his awesome crossbow.

then i changed my foot again to the walking foot so i could attach the binding.
 juki's walking foot is a total beast! look at this monster. it's twice the size of the ones i have for my other 2 machines.

 and here's where i learned some more humility. the last time or two i put binding on, it was a bit too close to the edge meaning when i flipped it, the binding on the back was wider than it was on the front side. so i thought, "i need to add a bit more to where i attach it. instead of doing it at 1/4", i'll do it just an 1/8th more at 5/8ths." yeah, you smart people can already detect my fatal fraction conversion failure.

 5/8ths, is of course slightly larger than 1/2", not 1/4". silly, silly. i stopped after a few inches to see how it was going. at least i was smart enough to do that.

 it wouldn't even fold over to the edge all the way, much less around it.

fortunately, it was a super-quick snip, snip and that was off. i adjusted my math and began again. whew! binding on. now the fun of sewing it down by hand on the back.

one thing i can say about my style of quilting, it's never boring! all these home ec moments keep me hopping. i think i should start a page to keep track of all the quilting lessons i've learned the hard way. on reflection, i could also call this blog "hydeeann's home ec moments."


my little photo helper said, "how about we do this side now?" so here's the back to humor her. and in case your eagle eyes noticed the binding isn't fully complete, you're right. but it'll be done tonight and i wanted to photograph while there was still good light out!

linking up to finish it up friday with crazy mom quilts.

Thursday, June 27, 2013

day off

 i was taking a quick no-calorie, summery gift (sparkly lip gloss!) to a friend while visiting teaching her this morning and decided to spruce it up with some sewing scraps. that little bow out of a bit of a fabric string made a nice touch that seemed to say, "i took a moment to make this a bit more special for you" rather than just delivering it undressed. if she was a sewer, of course i would have taken her some lollies.

 while the cat was away, the mice . . . baked. my oldest son is an adept in the kitchen and will whip up treats, with his own modifications, on a whim. his cousin was here and i can now tell my sister they didn't play the wii all day long, but did something constructive, too. miette, by the way has the most divine chocolate cake recipe ever. son said he adapted it to make it bake more quickly but did not elaborate how. oh, yes, and was out of some ingredient or other. but they were still yummy.

my wrist was hurting a tad this morning and the mr., who knows these things, said, yes, you can give yourself carpal tunnel or at least damage yourself in a week's time, so i laid off the sewing for the day. (maybe tonight?) i still got some quilt time in by curling up under the almost finished "romance in the garden" (binding sewn on one side, just needs tacking down!) with some new quilt books.

then i napped.
so the staycation is still being enjoyed.

and to be honest, i think it might be the computer, not so much the sewing that's got me achy. i need to work on my posturing all the way around at both these activities.

linking in to really random thursday at live a colorful life.

Wednesday, June 26, 2013

little quilting chores equal big quilt finishes

***giveaway contest on monday's post. scroll down or find here.
chain pieced french bunting, anyone?
week one of sewing staycation is drawing to a close over. on friday, i did all my mom duties and caught up with photo printing for project life in the morning. and took a nap i needed after my sewing all-nighter. then it was sew time. i wasn't particularly excited about doing any one thing, but i knew if i got a few small quilting chores out of the way, my projects would inch forward and then maybe i could do something fun.

the little chores tricked me, however. they exploded into great big ones. i decided to tackle adding blocks to that paris nightmare and getting it's sashing cut. it was supposed to be quick. isn't it always?  after spending like an hour deciding where to place the remaining blocks (i'm way too picky and analytic), i started sewing them on.
i think my son has been here
i still had the machine set up for fmq, so i had to switch feet. ugh. it's not that hard, i just don't like to do it. but i did. then i tried to sew and the darn block was going nowhere, just sitting there collecting stitches in one spot. "oh, dang!," i thought. "i really must have broken it after all. the feed dogs aren't moving. (see thursday's post for details.) wait. the feed dogs aren't up! they were dropped for fmq."

raised the feed dogs.
still no forward motion.
"oh my gosh! i did, i did, truly break it!!! why are all those stitches just on top of each other?"
open up the bobbin case, remove bobbin, clean out lint, reinsert.
still not moving.

"sugar! i don't want to have to take it in for service!"
glance at stitch length dial as eyes frantically rove machine for an explanation.
stitch length at 0 for fmq.
oh, yeah.

i may be almost 40 in body, but in sewing i'm still only about 3. this excuses me, i hope.

i got the darn thing straightened out and began sewing the strips. i haven't even calculated what the new measurements are going to be with the added blocks and changes in sashing. i no longer care. it will be what it is.

there is a ton of distortion going on with this top due to all the handling and also that eyelet sashing fabric. it is O. K. surprisingly, the eyelet has sewed up very sweetly and makes for great pressed seams.

in addition to assignments for paris nightmare, i gave myself the binding for "romance in the garden" to work on. i love binding, i really do. i got it cut and pieced. check another chore off.

oh, that hair! i have to keep all 2+ feet of it out of my face, so piled up it goes.
i do a lot of my quilt work gardener-style, on my knees. i prefer cutting this way because i can get right on top of what i'm doing, which seems to help with slip control. i also press on my pressing board on the floor because: 1) my son broke my ironing board so i can't put the pressing board on top of it as it no longer stands up; 2) the only other surface in my dining sewing area is my nice dining table, which i do not want anywhere near the steam or heat of the iron. so i work on the floor.

saturday, i knocked off the rest of the paris nightmare top. it really was a mess. i managed to mix up strips because i wasn't paying attention to my placement photo. i even turned some pieces around that should have been easy to know just from looking at them that they weren't in the right place.
the pattern i had going was: yellow, white, pink. when adding the last two squares on to the joined strips, i just made them into a block and added them on the end with one seam. incorrectly. that'll need to be fixed.


somehow, despite the fact that i've used my 1/4" foot and precut charm squares, my rows have ended up different lengths. that'll need a trim. and maybe a patch or two.

after all the headache(s), we do finally have a flimsy! and i think i'm going to call this one "paris daydreams" after all the nightmares she's caused. that should turn things around nicely, don't you think?

i've got lots more progress to report for this week's doings, but i've chosen to spend my precious staycation time actually quilting, not blogging so much. however, i've taken pictures along the way so stories and photos will be forthcoming. after the quilting.

linking in with lee at freshly pieced for wip wednesday

Monday, June 24, 2013

name that sweet giveaway and tutorial

i got the idea for my birthday blog party favors from my local quilt & scrapbook store, ETC. they were sitting in a jar on a display counter, looking sweet and tempting. and they were $5 a piece. i thought to myself, "$5 is a bit pricey for a fat quarter that is usually about $2.50. surely the packaging can't be that expensive and they look easy enough to make." so, i found some candy wrapping supplies at a chain craft store to give it a try myself. sure enough, it was simple and a money saver.

i think some crafty person at the shop must have whipped up these treats. they weren't packaged professionally with a company name, there wasn't any copyright or logo on them, not even a price tag - just a handwritten sign advertising them. therefore, i think it's okay for me to share my version of how i made them. i spent a grand total of about 10 minutes figuring out how to put them together. maybe they're all the rage on pintrest, but it's the first time i've seen them so i can't credit anyone else with the ideas i'm putting out because they are my own. if you thought of it first, never fear. i'm not making a dime off of this. 

making them myself, in fact, was quite a bit cheaper. by buying a package of sticks and one of bags, the price for each individual stick and bag was about $0.05 each. (where is my "cents" symbol on my keyboard?!) if you add in a bit for your ribbon or baker's twine, you have likely only added $0.50 or so to the total cost of your fq.

my only problem here is i don't know what to call the darlings. "fat quarter lollipops" just doesn't sound very yummy or cute enough. so i'm going to need some help with this. and i'm offering a giveaway for the help. see the end of the post for details.

now, on to sweet making!
the supplies you will need, other than your fat quarter, is a package of 4x6 cellophane treat bags, cookie/lollipop sticks, and something to tie off the lollies, like ribbon or baker's twine.

from here on down, i'm going to use small photos in the interest of keeping the scrolling to a minimum on this post. but all photos are stored larger so you can click on them if you  need to see them more clearly.

i tried two different methods of tying: a thin ribbon and baker's twine. i like the baker's twine better since i think it compliments rather than detracts from the fabric. the ribbon, even though small, seemed to dominate.

start by folding your fat quarter (fq) in half across the length (the selvage should be one of your ends you put together for the folding). give the fold a quick finger press to make yourself a temporary guideline for further folding.
open up the fq and fold the bottom edge up to that crease you just made at the halfway point.

fold the top down to meet the bottom edge in the middle. you could just start with folding in half, but making your fold this way will hide the raw edges of the fabric.

fold in half again so your fq is now folded in 1/4ths.

fold over one more time so your fq is now folded in 1/8ths.

there will be two edges to your folded strip: the top shows lots of folds, the bottom shows one continuous line. use the side with only one visible edge to the fabric as the top of your lolly for a neater look, if you care.

now to hide that last raw edge, you are going to fold the fabric strip in half across the width this time so that your raw edges meet up together at one end. your final fabric strip is approximately 2" x 12". (now, i didn't measure this so don't get out your measuring tape and freak out if yours doesn't match up to those specifications. i said approximately.)

place the stick on the fabric strip almost to the top, but not quite touching it (about 1/4" away), with the end of the stick extending out away from the edge of the fabric that shows all the folds.

tuck the raw edges of the fabric to the other side of the stick and begin rolling toward the other end, sleeping bag style. you will need to pinch down and sort of tuck in fabric as you go to keep it looking neat and flat.

there you have a rolled lolly. time to package.

put the lolly roll inside the cellophane bag, pushing it all the way up to the top.  turn the lolly so that the fabric fold is on the backside opposite you.

you can see there is lots of room still in the bag and there are two funny, pointy little ears on either side of the  lolly. that can be fixed.

slide the lolly over to one corner of the bag and pinch the bag snugly against the bottom of the lolly on the side with excess bag.

use your finger to tuck the corner of the bag in on itself. then, still holding it pinched close to the fabric, begin to wrap the cellophane bag around the fabric so that it lays close to the fabric. (you can do this with your other hand unless you are also trying to photograph as you go. ha.)

when the bag is wrapped closely to the fabric, twist it all the way around the stick. now your sweet is more tightly wrapped and there isn't so much excess bag hanging around.

if you moved the fabric fold end to the back of the bag, you can wrap the excess cellophane toward that fold so that all your not-as-pretty parts are in the same spot, giving you a nice clean look on the front side where your bow will go.

 keeping the bag pinched up against the stick and still wrapped around it, secure the bag with your choice of tie. you could use the twisties included with the bags, some sort of ribbon, baker's twine, etc.

i tried securing mine with a small elastic before i put the ribbon on, but because the stick was so long and the top so fat, it wasn't possible to get the elastic tight. i've found the ribbon or baker's twine hold it just fine.


oh, and lastly, tuck that other little ear/corner, that is still sticking up on the right side, in with your finger.

so there you have it: you have turned that fat quarter into a little sewers sweet, perfect to gift to a sewing friend or as a prize or favor for a sewing get together.

but what to call it?

here's the giveaway part!
if you have any brilliant ideas for names, please leave me your offering in comments. next saturday, july 6th, i will pick the name i like best and send you a prize. you can have your choice of a kit to make your own lollies (bags, sticks, baker's twine) or i'll send you a couple i made. you decide!
sorry, giveaway now closed

and even if you don't have a name, you can leave me a comment if you'd like.


linking in with Let's Get Aquainted! hosted at heart of charnwood this week.